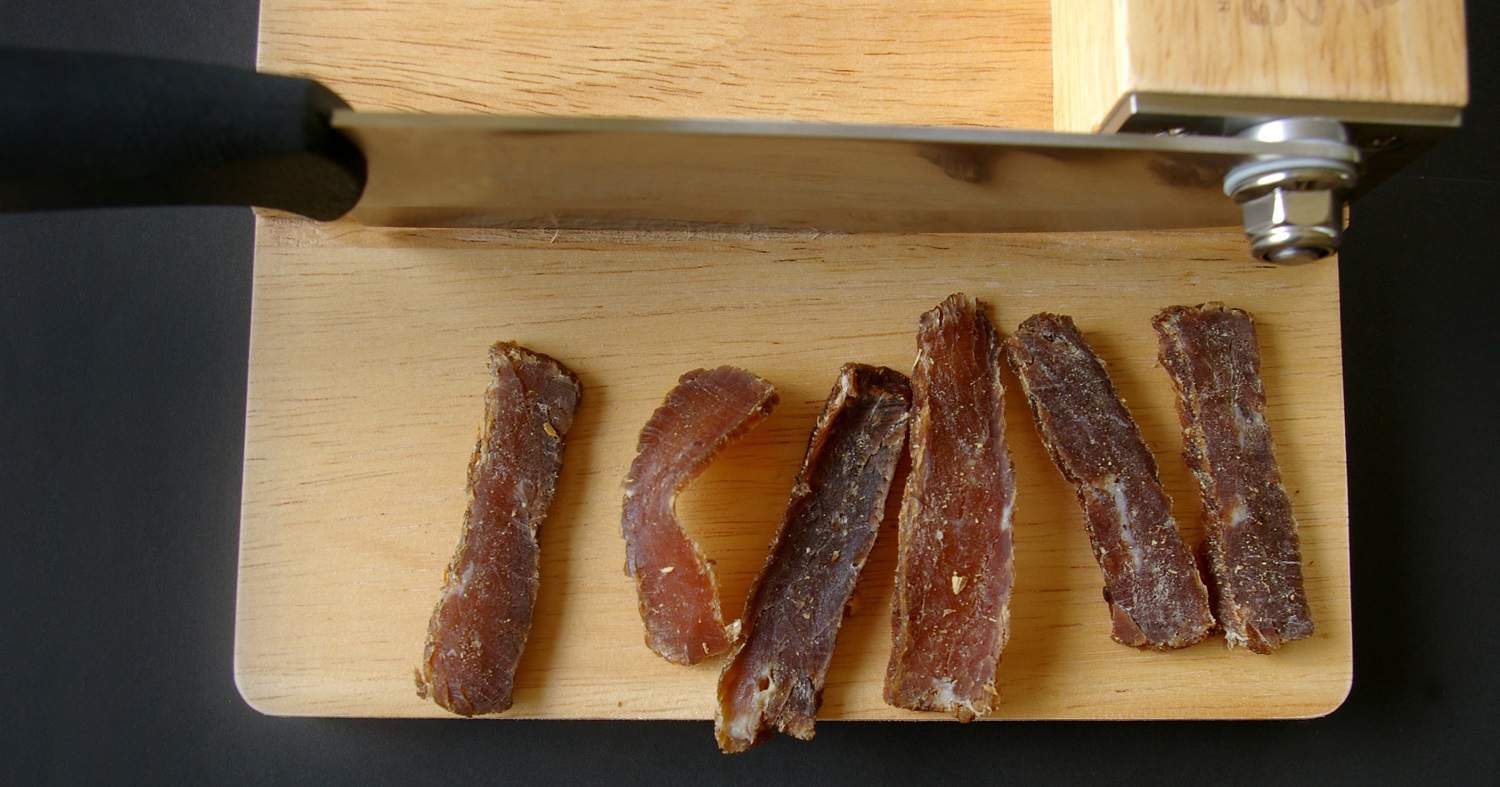
What I love about working with my meat slicer machine is that it adds speed and accuracy which is not there when I used to slice with my knives before.
I have been quite comfortable about its cleaning as well as in maintaining its blade, etc. What I have observed recently, a lot of people have asked me the tips to sharpening the blades of the slicer.
That’s what motivated me to make this post. I hope the tips and process for meat slicer blade sharpening below will be helpful to all the users.
Predominantly, let me assure you, it is a simple task and no rocket science.
You can use two ways to sharpen meat slicer machine’s blade.
One is by using the sharpener stone and the other is the manual process of sharpening with whetstones pads.
Let’s start with the process of sharpening meat slicer blade by a sharpener.
Table of Contents
How to sharpen meat slicer blade by a Sharpener?
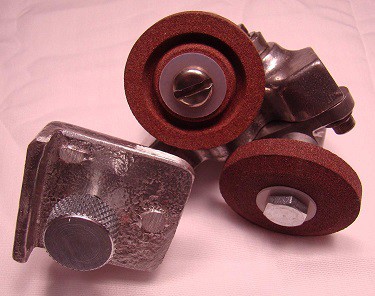 The sharpener of the meat slicer blade is the sharpening stone. Mostly these sharpening stones are given with the slicer at the time of purchase. However, you can buy these stones form the local hardware stores. Read here the steps relating sharpening of meat slicer blade by a sharpener.
Step 1: Clean the blade of the meat slicer
Before you start the sharpening process, you have to clean the blade thoroughly. You can do it with alcohol. The cleaning alcohol helps it to turn spotless as well as disinfected. Instead of alcohol you may clean the blade placing under flowing water. A clean blade gets sharpened faster.
Step 2: Place the sharpening stone on the meat slicer machine
You have to place the sharpener stone on the slicer safely and in a secured manner. If you are attempting this blade sharpening chore for the first time, check the user’s manual how the manufacturer has suggested to attach the stone model-specifically with the appliance.
Step 3: Locate the locking knob
Next comes the locking knob. The locking knob looks like a plastic button and it is positioned at the bottom left side of the base shaft. You 3rd step of blade sharpening is to locate the locking knob.
Step 4: Lock blade and the sharpening stones in the proper place
Once you find the knob, you have to unscrew it from the base shaft where it is attached with. Now you have to inset the sharpening stones on top of the base shaft area of the slicer machine.
Once the sharpening stones are steadily placed on the base shaft, now you screw the knob back in its place. Now position the slicer blade on the sharpening stones.
Secure the blade and the stone by tightening the sharpening lock-knob until you hear a clicking sound. This sound specifies that the whole thing is rightly, tightly, and safely placed.
Step 5: You have to turn on the Meat Slicer
Now plug in the meat slicer machine and switch it on to start sharpening the blade. Continue the sharpening process for about 30-40 seconds. Now turn the sharpener off for next 4 seconds, then repeat the sharpening process for more three (3) times.
Step 6: Take out the sharpening stone
Now unscrew the knob and glide the sharpening stones off toward the left side of the base shaft. Put back the meat slicer machine to the right side of the base shaft. After this, tighten up the sharpener locking knob back in its place.
Step 7: Clean the slicer blade thoroughly
Apply the rubbing alcohol again, and carefully clean the blade and wash it off by placing it under the flowing water. This cleaning spree will help you to get rid of the metal particles accumulated on the blade, while you were sharpening it.
How to sharpen meat slicer blade by hand?
 You can sharpen the slicer blade manually, at least I have tried it and got good result. In that case you have to use a sharp pebble sharpening Waterston pad. It is easy to use and widely available in online and regular market. It is a user friendly sharpening stone, and widely used for sharpening kitchen knives.
These whetstones pads have a rated grit, which denotes the size of its microscopic stone particles. Higher the number, the smaller the particles are and the less metal it will eliminate when used, generating a finer and, sharper edge on your blade. Most whetstones pads are made of two stones united into one. It is made of a low grit stone and a higher grit stone. One side is for the first coarse pass on a blade or knife, while the other is for the finer, more accurate pass.
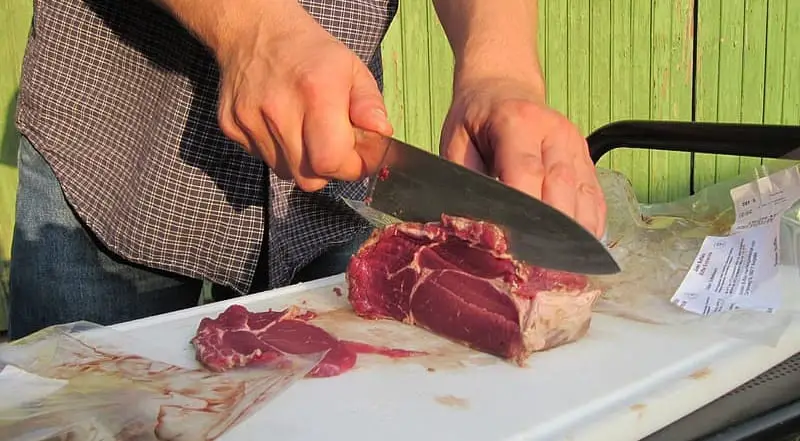
If you want to sharpen your slicer blade manually, you have to remove it from the slicer and try it here on the pad. Let me share with you how I did the job.
Step 1: Preparing the whetstone pad
I immersed it in normal water for 10-15 minutes and put it in the holder with the grainy side up. You can place it on a towel so that it stays fixed in case you don’t have the holder.
Drop water on the stone till it gets half drowned in water. This water keeps the stone greased and aids the blade to glide over the grit surface.
Step 2: Find the needed slant
Take the blade and hold it with the sharp edge up and keep one of the flat sides on the surface of the stone. You have to hold it with your thumb on the dull edge and place your index finger on the flat surface.
Now you have to lift the back of the blade up a little so the blade gets slightly tilted. To make sure that the cutting edge is flat, you have to place your finger on the blade to find the angle. But be careful, don’t hurt your finger as I did first time.
Step 3: start the job
Hold the blade at the aimed angle, pull it toward you crossing the stone in single smooth motion, so the whole cutting edge from the hilt to the tip is pulled crosswise on the coarse surface of the stone pad. Turn the blade over and slog it away from you and crosswise in the other course so the other side of the edge gets dragged over the stone. The whole move will be like portrayal of an X: One up-down rub on one side of the blade, one down-up stroke on the other will be perfect: repeat this move for five to six times.
Step 4: Flip the stone-pad and repeat
Now turn the stone over to the fine side and pour water on the surface to keep everything hydrated. Repeat the same style at the same pace, in the same angle five to six times more to give the blade the clean and sharp edge.
I strongly suggest not to push the blade over the stone because it will damage the edge. Don’t press the blade on the stone pad, either. Just hold it steady and let the stone-pad do the sharpening task.
Step 5: Clean up and test your blade
Finally, wipe the blade and whetstone with a paper towel or cloth to remove the microscopic pieces of metal that get attached to the blade. Before you put the blade to the meat slicer, clean it properly so that you can start working with it.
I had calculated that it takes 5-10 minutes for me to get the whole task done. If you are doing the sharpening task for the first time, you may take some more time initially, but take my word it is an easy to do job and not even risky for your hand.
How do you sharpen Bizerba slicer blades?
Are you planning to buy a new meat slicer? Want to go for the most popular models? Of course there are many but you will find Bizerba slicer in most of counters. This meat slicers are cleaning friendly too.
- Slide the cutting tray all the way off the Bizerba slicer. Go to the crank near the foot of the slicer to transfer the tray on the left side of the blade to its broadest point. Customarily, this tray regulates the chunkiness of meats.
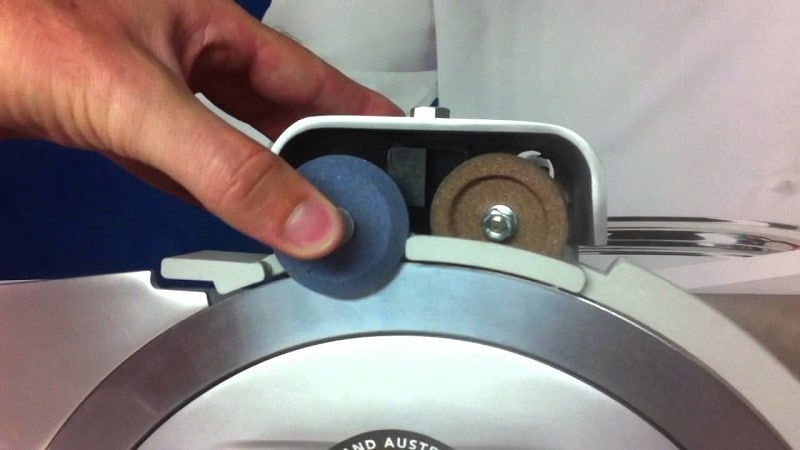
- Observe the Bizerba blade sharpener. On the base, you’ll see two wheels are there at specific angles. The top of the sharpener is fitted with a silver metal bar that can come out and down from the top of it.
- Glide the bent bar of the sharpener over the top of the tray with the help of the wheels against the tray. Glide the sharpener near the blade until you feel the sharpener is set into place. The tray and the sharpener have conforming notches that fit effortlessly with each other.
- Regulate the knob at the end of the bent bar to tighten up the sharpener alongside the thickness tray. Shake the sharpener a bit; it should not move if it is set.
- Turn on the Bizerba slicer, and let the blade spin.
- Turn the grey colored knob on the front side of the Bizerba sharpener down, the turning will be toward the 1 on the side of the sharpener. Keep it on for 30 seconds, and then turn the grey knob toward the 2 for next three-four seconds.
- Switch off the sharpener and the slicer. Remove the sharpener from the slicer and put it away.
- Carefully clean the slicer to clean the dust accumulated on the sharpener.
How to sharpen a Hobart Meat Slicer?
The other popular meat slicer is Hobart Meat Slicer. You can check the sharpening process of this meat slicer here to get the hang of it. I found it easy and safe for use.
- Be sure that the blade is clean before the method of sharpening to try. The stones works most efficiently on clean blades.
- Set the thickness dial at zero, and wash all oil tinge from the uncovered portion of the blade.
- Take out the carriage of the slicer. Regulate the thickness dial to 50.
- Detach the thumb screw on the sharpener assembly till it sets into the slot at the base of the gauge plate. Push the assembly steadfastly up, and tighten up the screw.
- Switch on the motor and let it run.
- Gradually regulate the dial so that the slanting side of the blade touches the crushing wheel.
- Rest the blade and take a look to see if a twang (burr) has formed on the reverse side of the blade.
- If a burr is seen, start the blade, and lower the nozzle of the truing stone. Grind for next 3-4 seconds.
- Release the truing wheel and back away the grinder simultaneously.
- You will get to see typical grind marks on the hind portion of the blade edge. Check to make sure that the burr is there.
The sharpening process of the Hobart Meat Slicer is done.
How to remove meat slicer blade?
While working with the meat slicer, once you will find that the blade of the slicer machine has finally become tattered out and you need to install a new one, you have to remove the slicer blade. You have to act cautiously to take apart the slicer-blade in an accurate manner from the machine. I have narrated here all the steps, which will help you to take away the blade safely as well as the steps will make sure that your slicer will start working in the right order once the blade is reinstalled.
Step 1: Get rid of the blade guard by removing the two thumbscrews positioned just behind the blade. Release the screws, and then lift the blade guard up and take it off the machine. Set the guard apart for later installation.
Step 2: Take out the large nut at the center of the blade. The top portion of the nut is about 1 inch diagonally with a hexa-shape. Set the top of the punch alongside one corner of the nut and gently tap on the punch. This will help you to unscrew the nut. When the nut will get loosened, you can totally remove it using your hands. Use of the punch I recommend, it reduces the risk of getting your hand injured.
Step 3: Now you have to open the slicer to the widest opening by rotating the slice dial. You must wear work gloves and now cautiously you have to remove the slice blade from the machine. Place the slicer blade in a container for instance in a plastic box to keep the sharp edges covered.
Step 4: Now clean the slicer machine and the blade guard. Use regular dish washer soap, and a big and soft sponge or a dish scrubber. This is the only safe chance when you can safely clean the remote portions of your slicer. Allow your machine to air dry thoroughly before your further use.
Step 5: Now put on the work gloves to grip the new blade and place on the bar, where the old blade was fixed. Place the nut at the center of the blade and tighten up the same with your fingers. Finish the tightening process by retreating the process with the punch, tapping at the edge in the reverse course. Replace the blade guard to complete your installation.
Safety measures while sharpening Meat Slicer Blades
Meat slicer blades are the most used component of the slicer and heavy duty uses may wither its edge. Then you have to change or sharpen the blade, however, it is a cumbersome job. You have to stay safe while doing. That’s the reason, safety measures are important while you are using the machine for slicing meat, or while you are sharpening its blade, as well as at the time of replacing it. Some of the suggested ways are:
Wear cut-resistant gloves
There is always the risk of slipping or loose grip problem while you work with the slicer blade. By wearing a cut resistant glove you can minimize the risk of injury.
Keep the work area free of clutter
A clean work area will help you to get your job done hassle-free, regardless you are sharpening the blade or you are changing the old with a new one.
Focus on the task
Stay concentrated. You are dealing with a sharp cutter. If you work unmindfully, you may suffer from accidental injury, which is strictly unwanted.
Never reach across the slicer
Reaching across the slicer, while it is functioning, can lead to injuries to the arm if it touches the rotating blade.. Always turn it off or walk around it if you want to cross it.
Lock the blade when not in use
Keep the blade always under cover when it is not in use. Just turn off the machine, unplug it, and transfer the blade to “zero” or in the locked position before leaving the machine unattended.
Clean with caution
Always use a cut-resistant glove when you will be cleaning the meat slicer. No matter you will do a quickie wash or a detailed job, use the work gloves and stay safe.
Never tamper with the safety switch
Safety watch is a vital component of the meat slicer machine. Tampering with the safety switch will violate the warranty restrictions and it will hamper the safety feature of the machine. Use with caution!
This is all about the sharpening of meat slicer blades. You can try then all by yourself. It proves maintaining a meat slicer is not a tough job. Let me know , how my suggestions have helped you.