Once you know how to slice meat efficiently and cook it to perfection, there’s more you need to learn about maintaining your cooking and slicing equipment. If you use your slicer on a daily basis or even semi-regularly, then it comes into contact with raw meat very often. There are high risks of contamination that can cause food-borne diseases in the longer run.
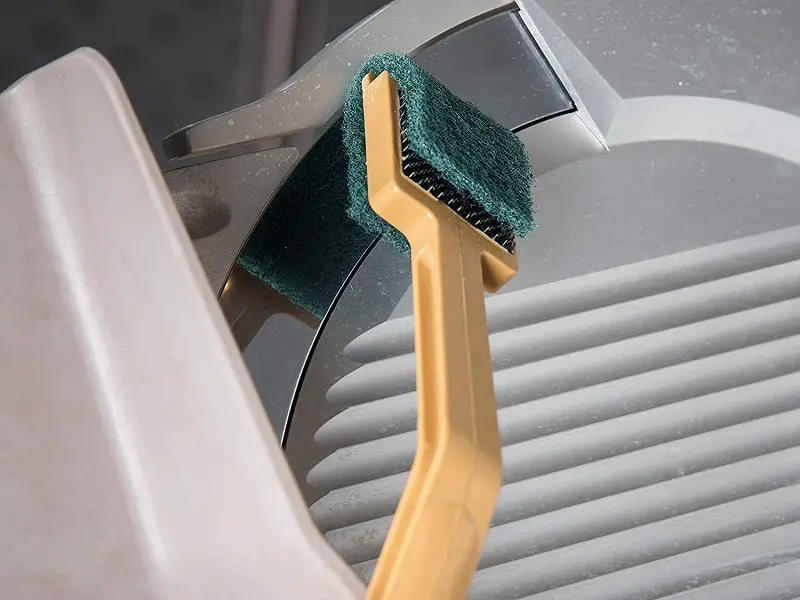
Table of Contents
Why are cleaning meat slicers essential?
Leftover food and grown bacteria from previous use can contaminate the freshly cooked food, which can be really harmful or your health. If these bacterial growths aren’t cleaned out periodically, it can easily get transferred into the upcoming slices of food and not only alter the flavor or taste but can also have adverse health effects.
This makes it really important to clean out your meat slicers so you can get clean and hygienic food with every use. It also ensures the longevity of the slicer, which is likely to last longer if well maintained. For new users, it can be complicated to understand what exactly to do to clean a meat slicer. Not understanding this can prevent you from cleaning well and can also be risky to one if necessary precautions aren’t taken.
How often must a meat slicer be cleaned and sanitized when in constant use?
One can wonder about how often they should clean their slicers. It really depends on how often your slicer is used.
When in constant use, it can be a good idea to have a brisk clean every day and a thorough clean every fifteen days. A deep clean isn’t recommended too often as it can blunt the blades if scrubbed too vigorously too often.
There can be some parts that can be particularly tricky to clean. This can be seen in the ring guard mount and blade guard mainly. Some food can often get accumulated around these areas. These need to be cleaned particularly well as these are the spots that could house bacteria. Clean these areas thoroughly for a full-proof sanitization.
Check out or Ultimate Guide on Best Meat Slicers of 2020
Step-wise procedure to clean your Meat Slicer
First of all, before starting any cleaning, it is always advisable to wear protective gloves, particularly while handling the blade. You should go through the cleaning instructions on your device manual if available. Most devices come with specific instructions, so this can be really helpful. It is also advisable not to use steel wool even for a thorough cleaning as it can damage the slicer blades.
Once you have your protective gear ready, follow these simple steps to sanitize and clean your meat slicer effectively:
- Make sure that the slicer is unplugged from the socket before any cleaning begins. Set the blade setting at zero for double security. Make sure any batteries or other power sources are removed for ensuring no hazards can occur when you are dealing with the blades.
- Wear a pair of cut-proof gloves, and you can start with the cleaning process.
- Wipe away any large pieces of food or remaining meat with a tissue or cloth.
- Before proceeding to any deep cleaning, you need to disassemble the meat slicer. Go through your device instructions to make sure you do that properly. Separate out the blade and guard plate along with the knife sharpener.
- Once the components and sharp elements of the slicer are removed, fill your sink or a tub with hot water and add some dish-washing liquid to it. Mix well into the water to create bubbles to rinse away the dirt.
- Clean the slicer as per your device instruction or just clean the parts that come in direct contact with the meat with a brush or sponge.
- Rinse out thoroughly again in hot water to wash out the detergent.
- Make sure you scrub the parts in a steady motion, including all knobs and screws where residual food could get stuck.
- You can even use a dilute bleach solution to sanitize further any areas that you might have missed out.
- Once you are done cleaning, allow all parts to dry completely separately.
- You can add some oil to the blades before reassembling them so that they are easy to use for the next slicing session.
- Make sure all parts are arid before connecting to any power source or batteries again.